Updated January 18, 2025
As an avid bullet journalist myself, here’s a complete beginner-friendly guide to writing bullet journal!
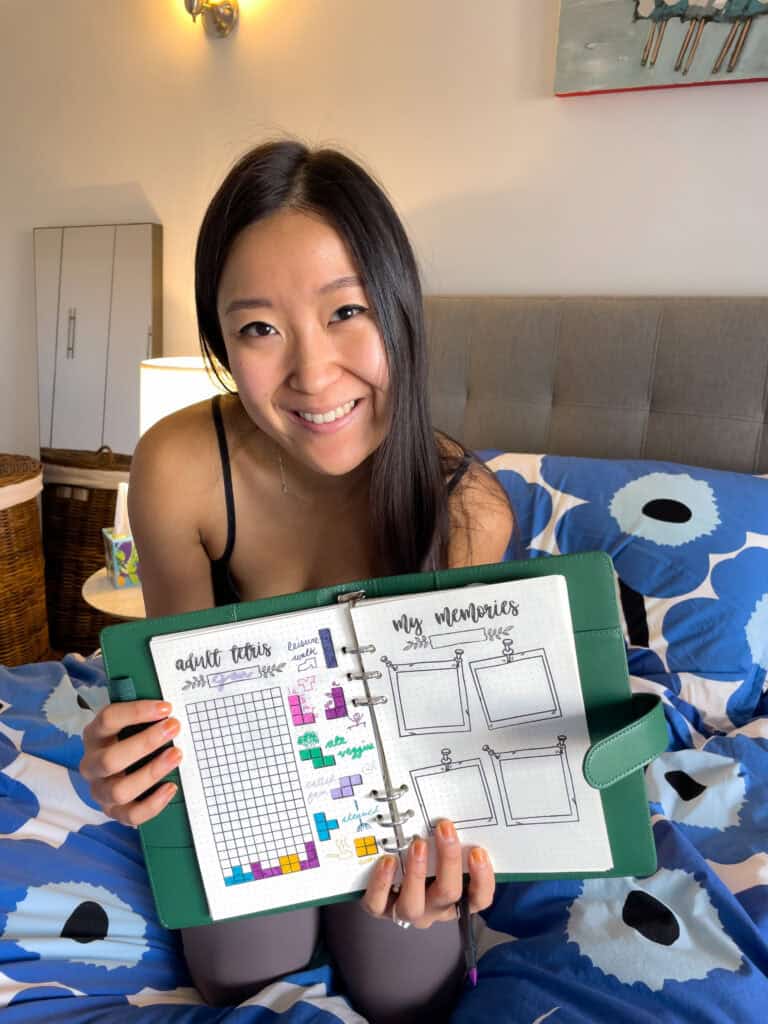
After watching those highly satisfying bullet journaling reels, I wanted to give bujo a try.
I didn’t know where and how to start, though – especially as someone who doesn’t really know calligraphy or how to draw.
After months of trial-and-error and reading Ryder Carroll’s book on his bullet journal system, I’m here to share with you everything I know.
Create your first bullet journal with any notebook (dotted is best, but lined is okay!) and this step-by-step guide.

With that, let’s dive into writing bullet journal!
10 Step Guide to Writing Bullet Journal
1. Number all the pages
This step is tedious. But it will make your analog blank notebook as handy as an online note-taking system.
(No journal? No worries — here’s my Google Docs bullet journal template!)
Write each page number on the bottom of the page.
I like writing the numbers on the outer corner of the page (so for the left page, the leftmost side).
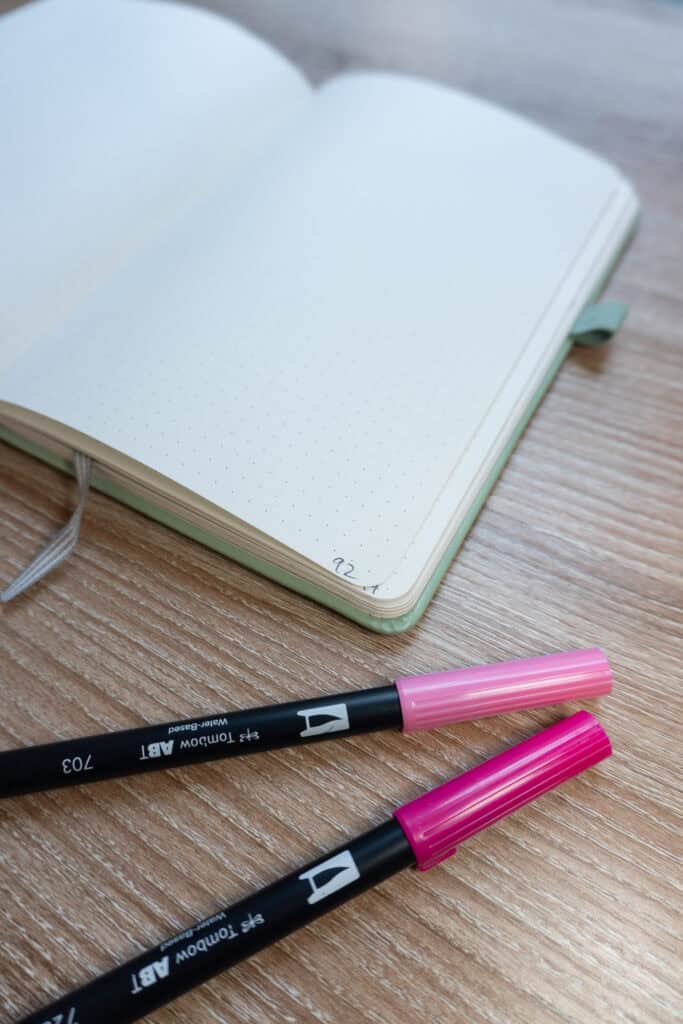
This is because then the numbers are less distracting and allow for more flexibility with spread designs.
In addition, you’ll be able to write down related pages more easily.
For example, if you only left one page for apartment projects, but you end up needing more pages, then you can write down related pages next to the main page number.
2. Key
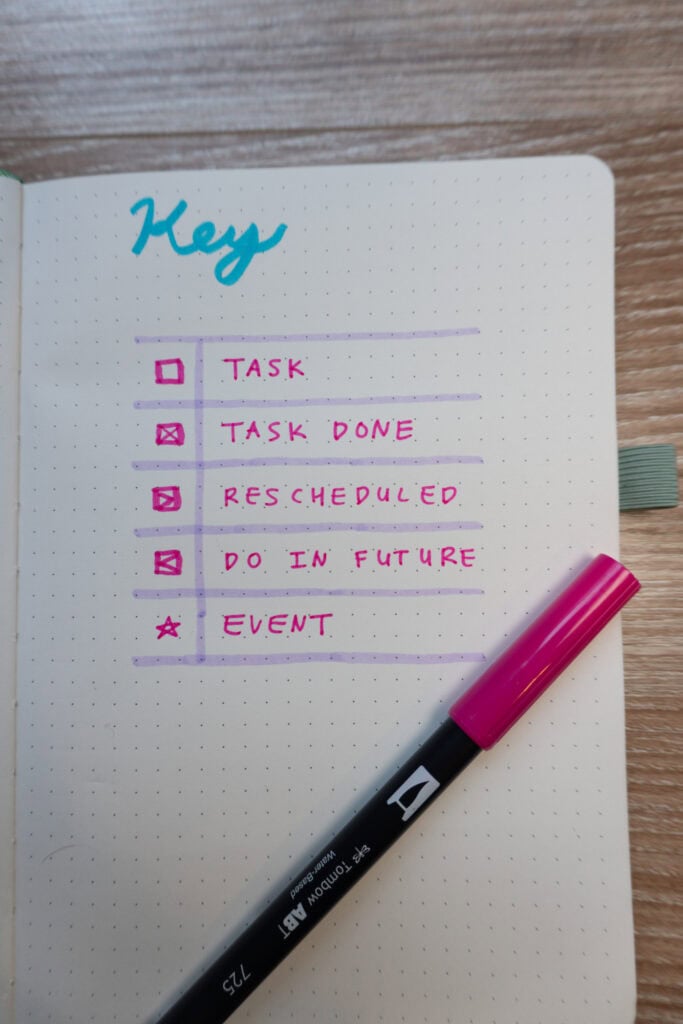
One of the core tenets of the bullet journal method is using different symbols (instead of simple bullet points for everything).
Create one page to serve as the key for your notetaking symbols.
For example, I like using an empty box as my task bullet.
Here is the system I like to use:
3. Index Page
One of the upsides of an online note-taking app like Notion is that it’s relatively easy to search your notes in the future.
However, you can make it easy to browse your paper notebook by creating and maintaining one or two Index Pages.
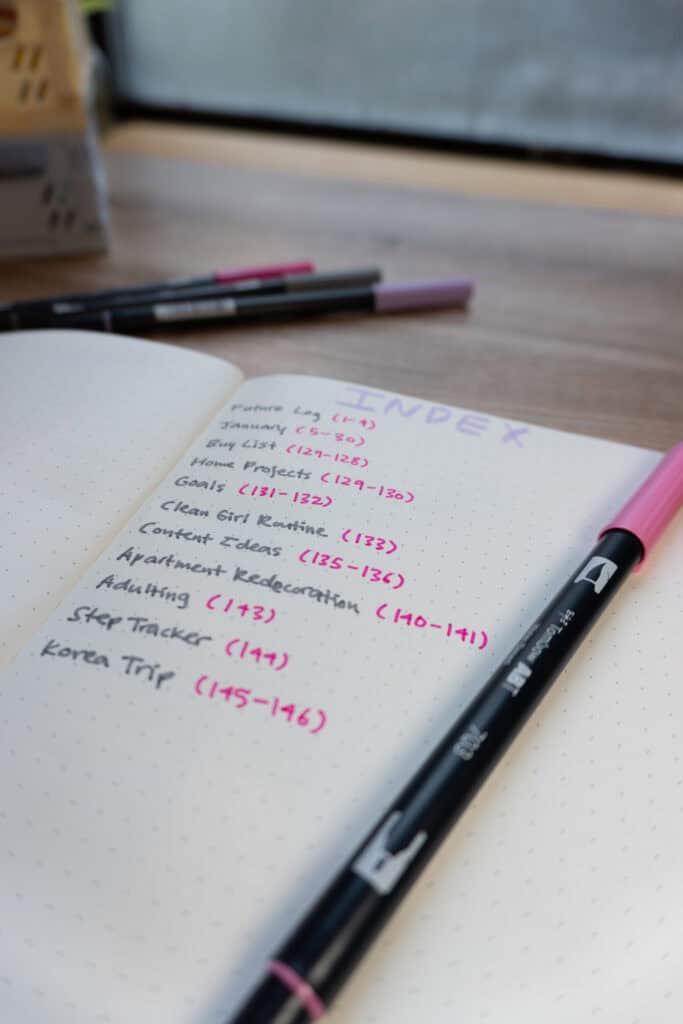
Like the Index of an encyclopedia, you can denote different months and custom collections and their page ranges, so that you can find them easily later.
Most bullet journalists dedicate only one page range for a single month, instead of marking down the monthly log and the daily spreads separately for that month.
4. Pen Test Page
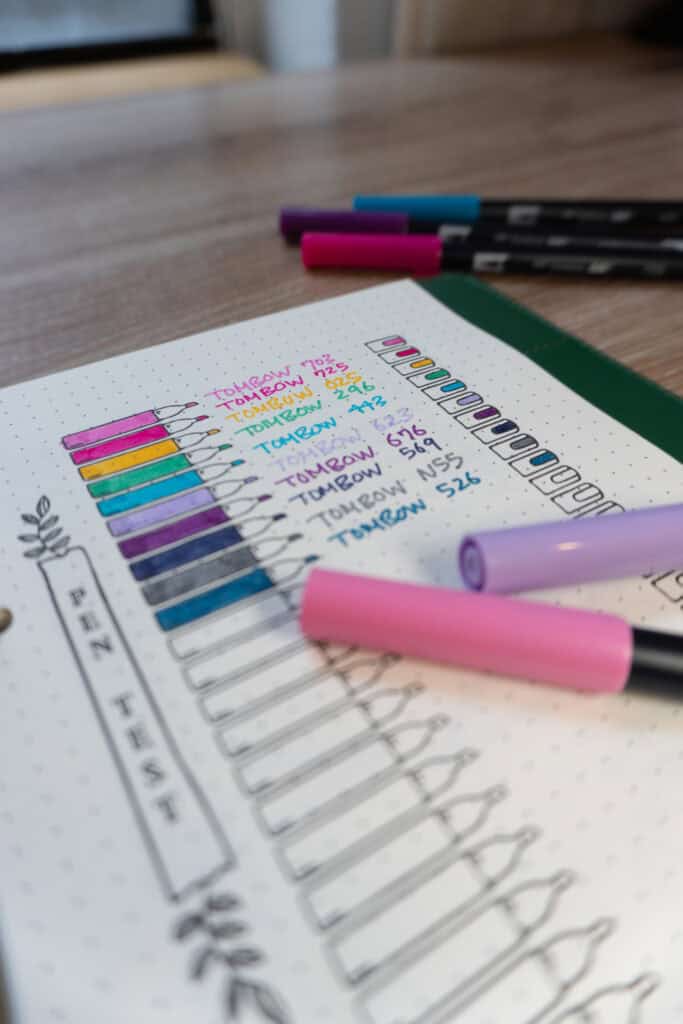
Dedicate one or two pages as your pen test pages.
When you acquire new pens, you can write down their model name and test them to see if they bleed through the back of the page.
In addition, this pen test page comes in handy if you forget which pen gives you which color.
5. Washi Tape Page
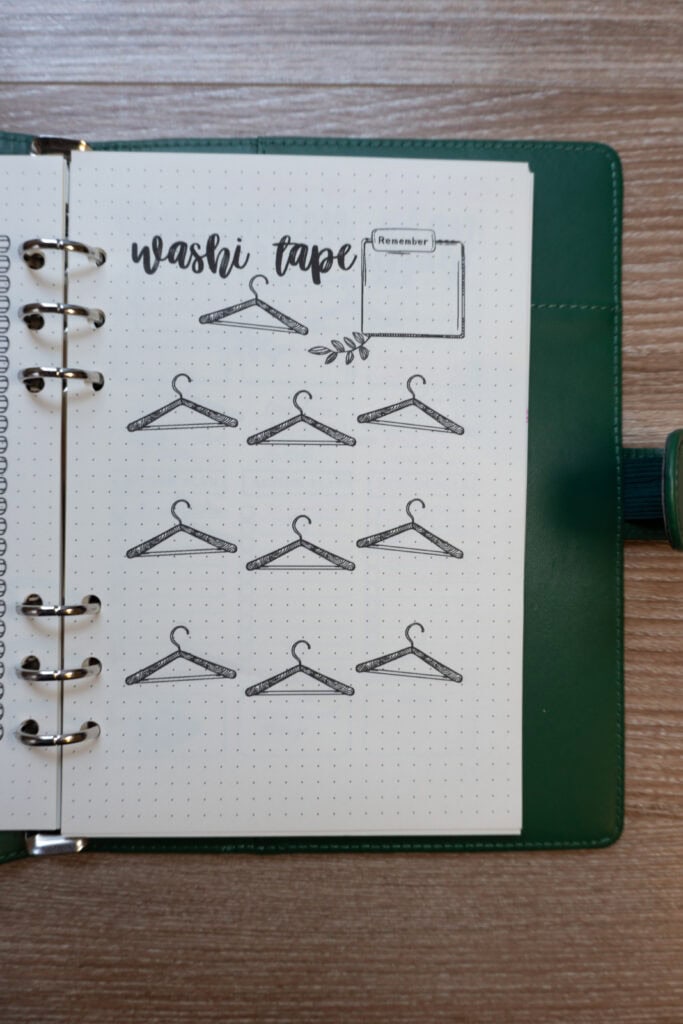
This step is optional!
But if you intend to decorate your journal with cute washi tape, then this page serves as your key of sorts to keep track of all your options.
6. Future Log
Now, we’re really getting started!
The Future Log is a monthly spread of the year.
I like to dedicate 3 months per page. Use it to track important dates, like birthdays, annual checkups, or tax deadlines.
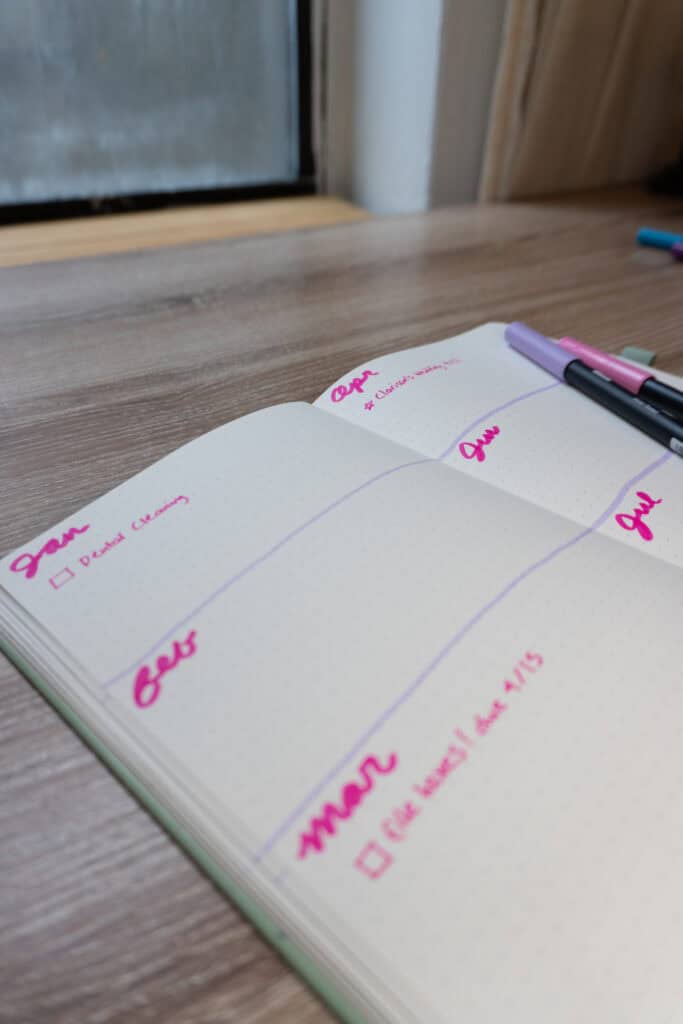
Once you start using your bujo, you might want to reschedule certain tasks way into the future (like a home project).
You can do so by moving that task from your daily log to a future month in the future log.
Then, once that month comes, you can review the future log for important details, then move any items that are still relevant to your monthly log.
7. Monthly Log
Reserve a two-page spread (two pages that face each other) for your monthly log.
Your first page will contain all the days of the month. List them numerically and the day of the week as well.
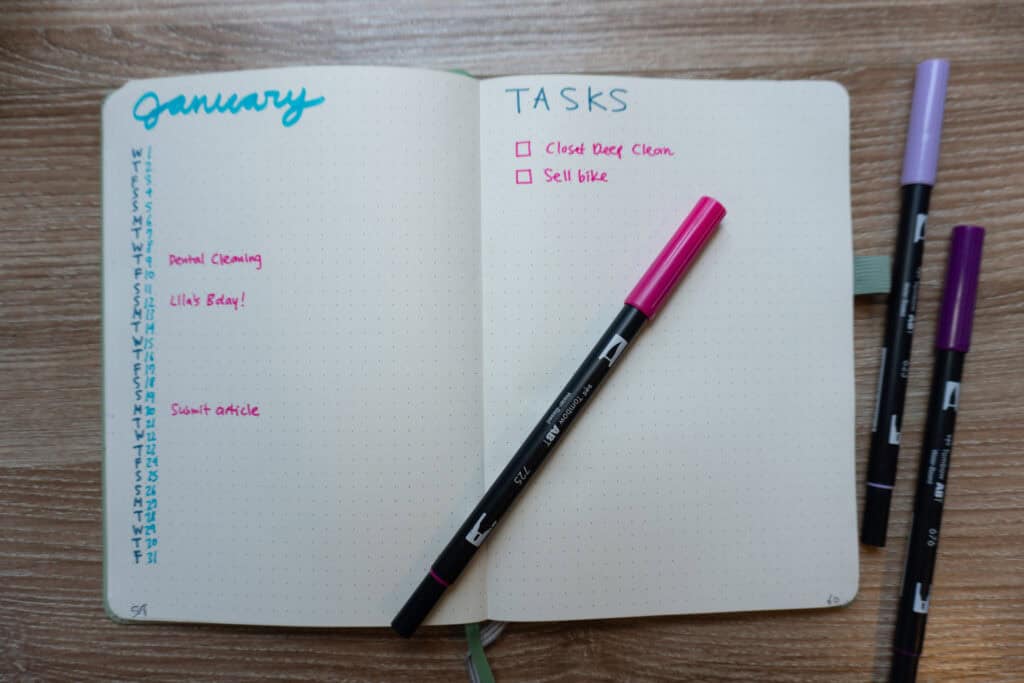
I like to place my days of the week before the date. It looks neater to me, because next to the date, you will write down any key tasks or events.
You could use this monthly log as your record of the most important thing that happened that day, such as a major project milestone.
Reserve the second page as your monthly task list. When I get overwhelmed, I like to brain dump all my outstanding tasks here, so that I can allocate them later.
8. Weekly Spread
Ryder Carroll’s bujo method skips the weekly spread. But I, like many bullet journalists, find having this spread helpful.
Reserve a two-page spread for your upcoming week. I divide each page into a 4-section quadrant, resulting in 8 sections total.
Then, each of the days of the week can have its own rectangle.
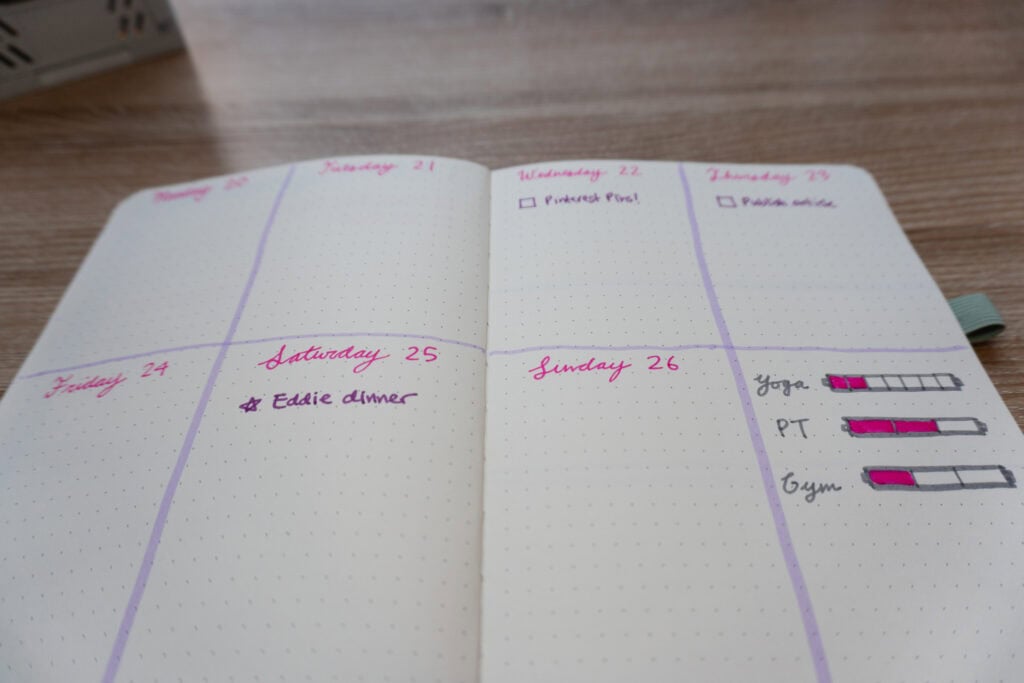
But you still have one rectangle left over for your choosing. You could create weekly habit trackers in this space (ex. for workout days or cleaning tasks). Or, you could use this space to write down weekly tasks to allocate later.
I like to fill out my weekly spread on Sunday nights, so that I have a clear idea of my main events coming up (ex. meals with friends) as well as my main work deliverables for the week.
9. Daily Log
Now, onto the magic of bullet journaling!
Both daily tasks and events live here.
Take a page from Ryder Carroll’s rapid logging method, and record the happenings of your day with brevity rather than intense detail. The idea is to make journaling easy so that you stick with it. In addition, it’s easier to notice patterns in your life with shorter notes.
Personally, I like to reserve one page for my daily log. I split the page in half, and use the right side as my daily task list. Then, I use the left side to plan out my day by the hour the night before.
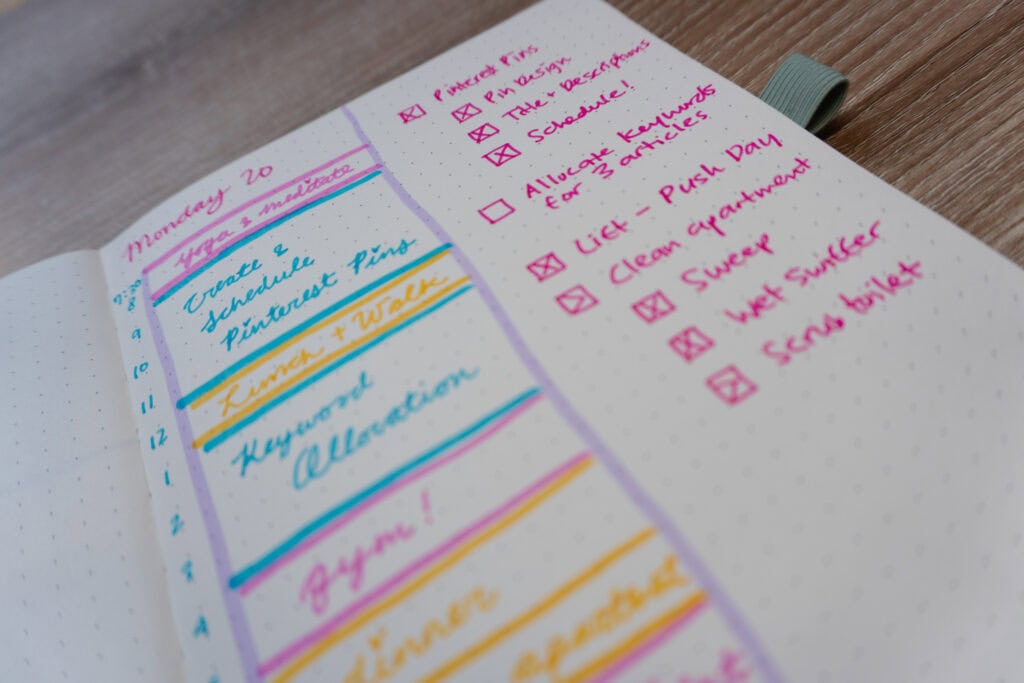
While I don’t end up strictly sticking to my plan, I find that having a time-blocked plan declutters my mind and forces me to be realistic about how much I can get done in one day.
To be honest, I have a separate journal to record the important events of the day that I’d like to remember. Therefore, I don’t include them in my daily spread.
Instead, I write down my most precious happenings of the day in an altered form of the monthly log, in a separate journal.
My main reason behind this is that I don’t have a lot of storage space because I live in NYC. Therefore, I craft a tasks bujo (filled with my daily to-do lists) that I’d be comfortable discarding, while my intention is to keep my memories bujo.
10. Collections Pages
Now onto the most fun part of the bullet journal!
Anything outside of the organizing monthly to daily pages of the bujo are called collections pages.
You can fill in the blank pages with a habit tracker, say to improve your mental health (ex. a mood tracker). Many people also like to keep a record of book reviews or their favorite songs of the month, as cherished memories to look back onto.
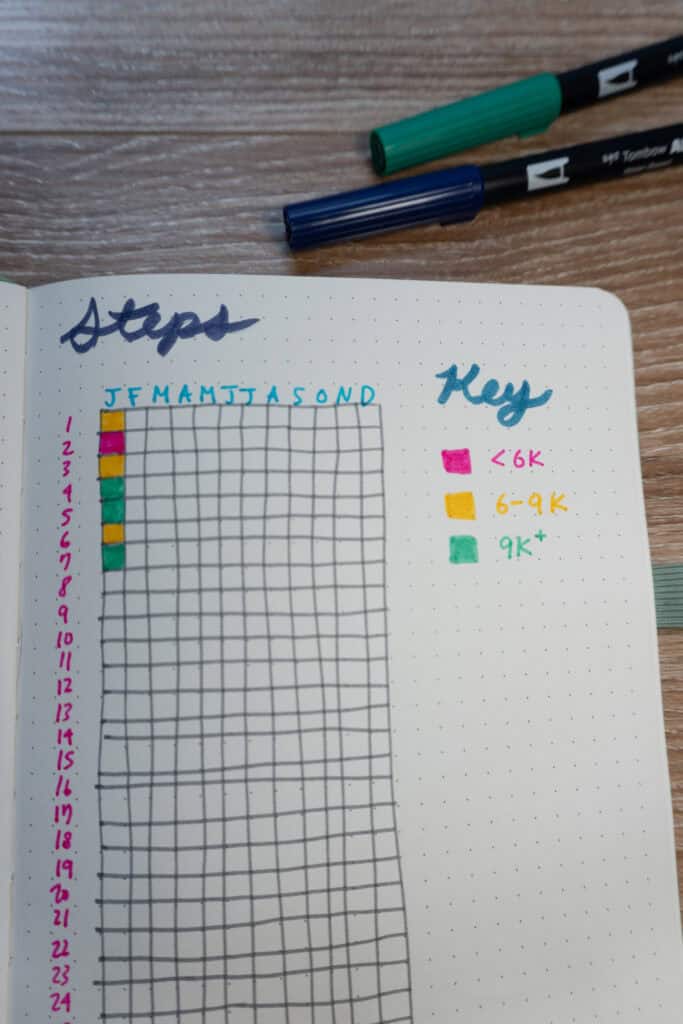
To get started, I would reflect back on your most important goal. Then, I would think of what daily habits would help you achieve that goal. Let’s use the example of tracking your steps.
You can then create a pixel habit tracker, with 12 columns each with 31 days. Then, you can create a key of colors to represent how many steps you took (ex. red for < 6,000 steps, yellow for 6,000-9,999 steps and green for 10,000+ steps).
I also love creating conceptual maps of ideas to organize all my thoughts. For example, I have a buy list, where I list anything I want or need to buy. I also have a home projects list, and a list for work-related projects I don’t want to forget about. While these word maps aren’t particularly aesthetic, they concisely capture my otherwise scattered thoughts.
Writing Bullet Journal (Conclusion)
In this guide, we went over writing bullet journal.
- Number all the pages
- Key
- Index Page
- Pen Test Page
- Washi Tape Page
- Future Log
- Monthly Log
- Weekly Spread
- Daily Log
- Collections Pages
Thanks for checking out my article about writing bullet journal!



Leave a Reply